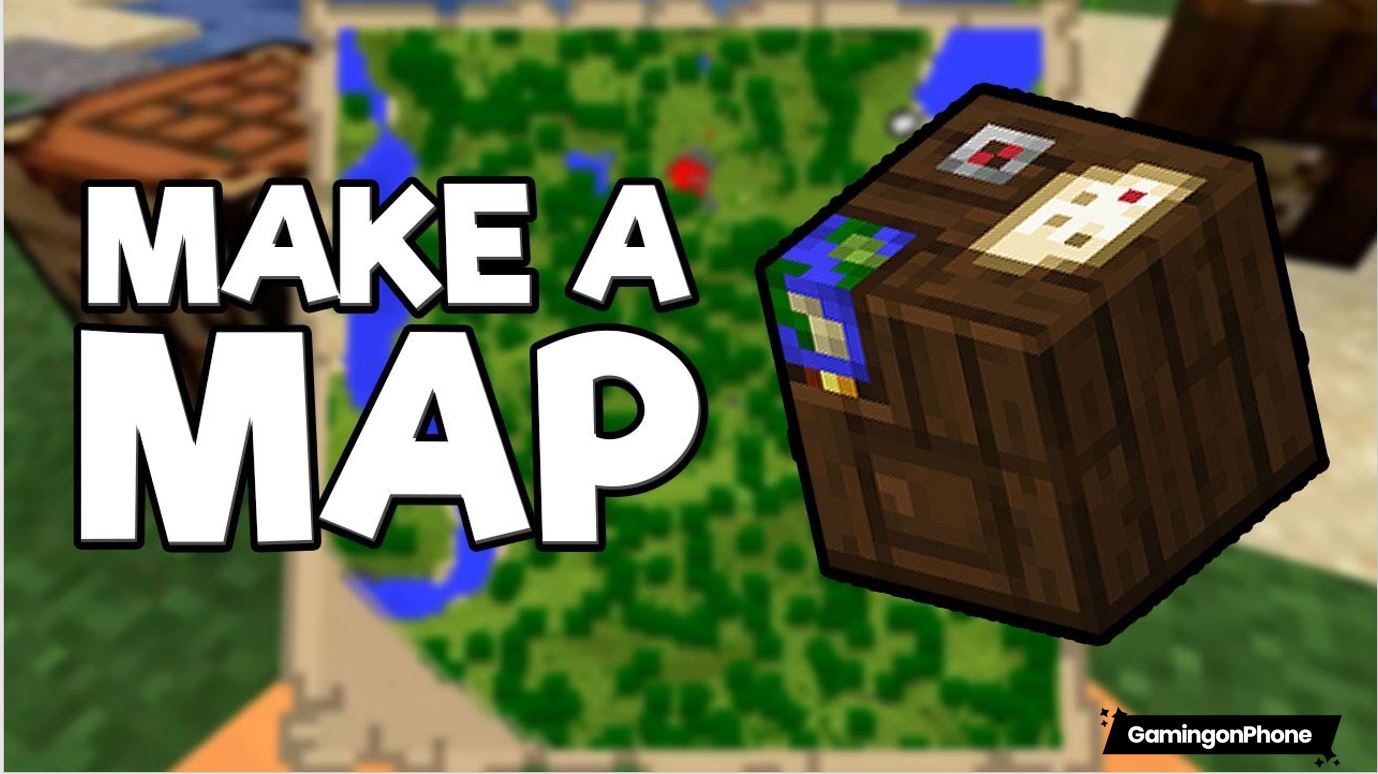
Crafting a Detailed Minecraft Map: A Guide to Creating a 9×9 Grid
Related Articles: Crafting a Detailed Minecraft Map: A Guide to Creating a 9×9 Grid
Introduction
With great pleasure, we will explore the intriguing topic related to Crafting a Detailed Minecraft Map: A Guide to Creating a 9×9 Grid. Let’s weave interesting information and offer fresh perspectives to the readers.
Table of Content
- 1 Related Articles: Crafting a Detailed Minecraft Map: A Guide to Creating a 9×9 Grid
- 2 Introduction
- 3 Crafting a Detailed Minecraft Map: A Guide to Creating a 9×9 Grid
- 3.1 Understanding the Basics of Minecraft Mapping
- 3.2 Creating a 9×9 Grid Map: A Step-by-Step Guide
- 3.3 Benefits of Creating a 9×9 Grid Map
- 3.4 FAQs About Creating a 9×9 Grid Map
- 3.5 Tips for Creating Effective Grid Maps
- 3.6 Conclusion
- 4 Closure
Crafting a Detailed Minecraft Map: A Guide to Creating a 9×9 Grid

Minecraft’s vast and procedurally generated world offers endless exploration, but navigating its sprawling landscapes can be challenging. Fortunately, the game provides a powerful tool for mapping: the cartography system. This guide explores the process of creating a 9×9 grid map in Minecraft, enabling players to meticulously chart their surroundings and uncover hidden treasures.
Understanding the Basics of Minecraft Mapping
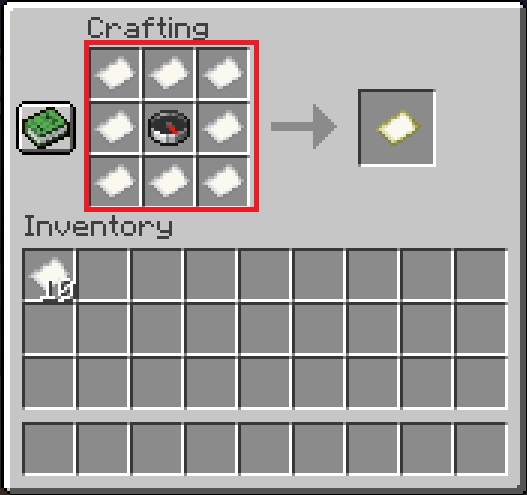
The fundamental element of Minecraft mapping is the map. This item, crafted using paper and a compass, serves as a blank canvas onto which the player’s surroundings are projected. The map’s scale is determined by its size, with larger maps encompassing a broader area.
Essential Materials:
- Paper: Obtained from sugarcane, which can be found growing near water sources.
- Compass: Crafted using iron bars, which are smelted from iron ore found underground.
Crafting a Map:
- Gather the necessary materials: Collect eight sugarcane and smelt iron ore into iron bars.
- Craft paper: Place three sugarcane in a crafting table to obtain three paper.
- Craft a compass: Place four iron bars in a crafting table to create a compass.
- Combine the materials: Place one paper and one compass in a crafting table to create a map.
Creating a 9×9 Grid Map: A Step-by-Step Guide
The process of creating a 9×9 grid map involves multiple steps, each building upon the previous one.
Step 1: Initial Map Creation:
- Craft a standard map: Begin by crafting a standard map using the method outlined above. This map will act as the foundation for the grid.
- Place the map on a crafting table: Right-click on a crafting table and select the map from your inventory.
- Expand the map: Right-click on the map in the crafting table to expand its size. Repeat this process until the map reaches a size that covers the desired 9×9 grid area.
- Place the map on a frame: Maps can be displayed on a frame, allowing for easier viewing and reference. Craft a frame using eight sticks and one plank.
Step 2: Marking the Grid:
- Choose a starting point: Select a clear and easily identifiable location within the area to be mapped. This point will serve as the origin of the grid.
- Mark the grid lines: Using a marker of your choice, such as a block of wool or a different colored block, create lines extending from the starting point. These lines will represent the grid’s axes.
- Establish the grid: Place the markers at regular intervals, creating a 9×9 grid pattern. The spacing between each marker should be consistent and clearly visible.
Step 3: Filling the Grid:
- Explore the area: Carefully explore the 9×9 grid area, noting any important landmarks, resources, or points of interest.
- Mark significant features: Use markers or symbols on the map to represent these features. Different colors or shapes can be used to distinguish between different types of features.
- Label key points: For added clarity, label important locations, structures, or resources using sign posts or text markers.
Step 4: Refining the Map:
- Update the map: As you explore further, add new information to the map, expanding its detail and accuracy.
- Improve readability: Adjust the marker placement or symbols to ensure the map remains clear and easily interpretable.
- Add additional layers: Consider using multiple maps to create different layers of information, such as resource maps, landmark maps, or even maps dedicated to specific biomes.
Benefits of Creating a 9×9 Grid Map
- Enhanced Navigation: A detailed grid map provides a clear visual representation of the surrounding area, simplifying navigation and reducing the risk of getting lost.
- Resource Management: Mapping resource locations, such as ore deposits or farms, facilitates efficient resource gathering and management.
- Base Planning: Grid maps can be used to plan the layout of bases, structures, and farms, ensuring optimal utilization of space and resources.
- Exploration and Discovery: Detailed maps encourage exploration and help players uncover hidden treasures, secret locations, or rare resources.
- Collaboration and Communication: Shared maps facilitate collaboration among players, enabling them to coordinate efforts and share knowledge.
FAQs About Creating a 9×9 Grid Map
Q: What is the ideal size for a 9×9 grid map in Minecraft?
A: The size of the grid map depends on the area you want to map. A standard map can cover a 128×128 block area. To create a 9×9 grid, you would need to expand the map several times. The number of expansions required will depend on the desired grid size.
Q: Can I use other blocks besides wool to mark the grid lines?
A: Yes, you can use any block that stands out from the surrounding environment and is easily recognizable. Consider using blocks with different colors, textures, or shapes to create a visually distinct grid.
Q: Are there any tools that can assist in creating a grid map?
A: While Minecraft does not offer built-in tools for creating grids, there are several mods and plugins that can automate this process. These tools can help streamline the map creation process and provide additional features like automatic grid generation and map overlays.
Q: Can I create multiple 9×9 grid maps to cover a larger area?
A: Yes, you can create multiple 9×9 grid maps to cover a larger area. Each map can be linked to the others, allowing players to navigate seamlessly between different sections of the map.
Tips for Creating Effective Grid Maps
- Choose a clear and visible marker: Select a block or material that stands out from the surrounding environment and is easily recognizable.
- Maintain consistent spacing: Ensure that the grid lines are spaced evenly to maintain the accuracy and clarity of the map.
- Use different colors or symbols: Employ different colors or symbols to represent various types of features, improving the map’s readability.
- Label important locations: Use sign posts or text markers to label key locations, structures, or resources, providing additional context and information.
- Regularly update the map: As you explore and discover new areas, update the map to reflect the latest information.
- Collaborate with other players: Share maps and information with other players to create a comprehensive and detailed map of the area.
Conclusion
Creating a 9×9 grid map in Minecraft is a valuable endeavor that enhances exploration, navigation, and resource management. By carefully following the steps outlined in this guide, players can craft detailed maps that serve as essential tools for navigating the vast and ever-changing world of Minecraft. From uncovering hidden treasures to planning efficient bases, grid maps provide a tangible representation of the surrounding environment, empowering players to conquer the challenges and unlock the secrets of Minecraft’s world.


Closure
Thus, we hope this article has provided valuable insights into Crafting a Detailed Minecraft Map: A Guide to Creating a 9×9 Grid. We thank you for taking the time to read this article. See you in our next article!